Whether you’re having a major problem and want to start fresh, or plan to sell your Mac and need to reset it, reinstalling macOS is a relatively painless process. We’ll walk you through it.
Note: I performed this process using a mid-2012 MacBook Pro running OS X 10.7 Lion and ended with macOS High Sierra. The process may look slightly different on your machine.
Before You Start: Back Up!
Presumably, you’ve used this computer for some time and have personal data on it. Reinstalling macOS will wipe everything on your system, so it’s vital that you back up first. Before you back up, you might want to free up space by getting rid of old files you never use.
The easiest way to back up is using Apple’s built-in solution, Time Machine. We’ve covered how to use Time Machine to back up your Mac; you’ll need an external hard drive to take advantage of it.
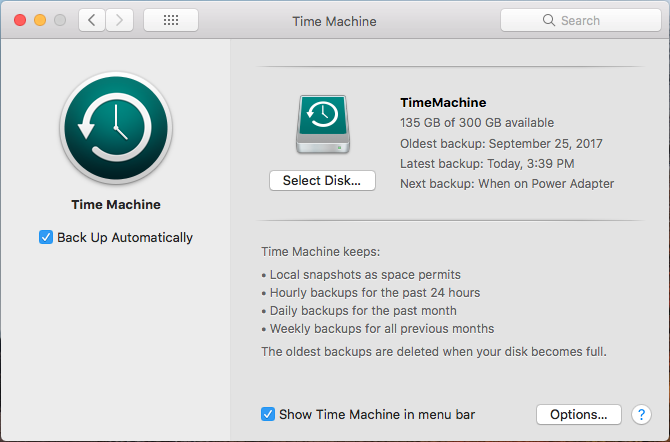
If you don’t want to use Time Machine or don’t have an external hard drive, you can look at alternate Mac backup solution. Some of these offer cloud backup, so you won’t need any extra storage handy. However, cloud backups almost always require a paid subscription.
If you only have a small amount of files, you might look at syncing your most important files to Google Drive or other cloud storage. Another alternative is copying your vital folders to a USB flash drive.Whatever you choose to do, remember that this process will erase everything on your Mac.
Sign Out of Apps
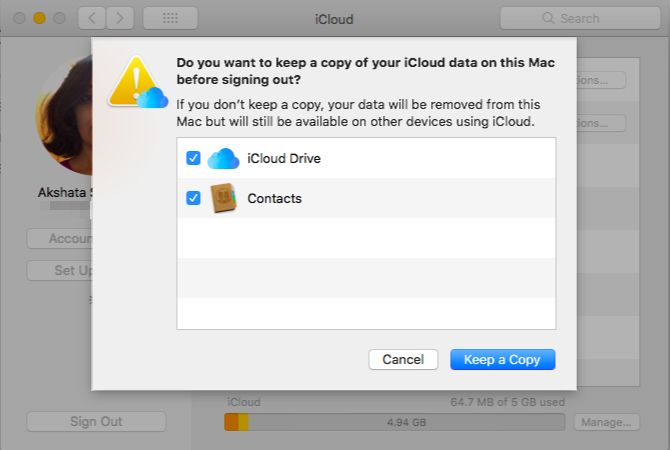
Before you proceed, you should also take the time to log out apps on your computer. Services like Adobe Creative Cloud limit the amount of installations you can use, so you should sign out to avoid wasting one on a non-existent system.Finally, sign out of iCloud by visiting System Preferences > iCloud and choosing Sign Out.
Step 1: Boot Into Recovery Mode
In the old days, you could reinstall the OS through the DVD that shipped with your Mac. But since new Macs don’t have an optical drive, we’ll use the built-in Recovery Mode to do so. This will work on any Mac running OS X 10.7 Lion or later.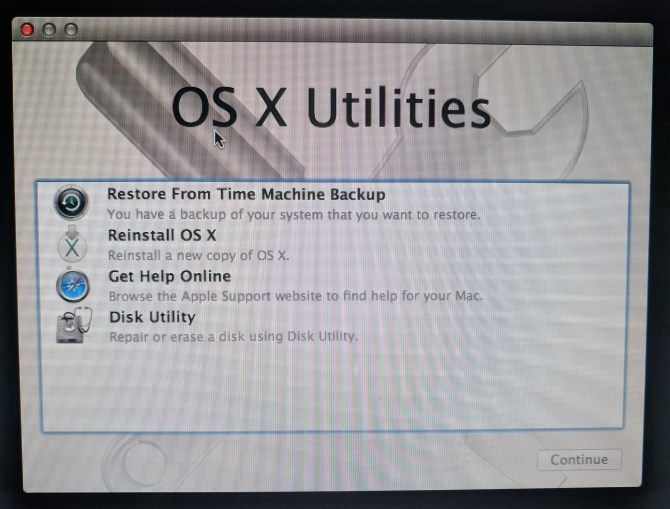
If this doesn’t work (perhaps your computer freezes at the Apple logo as mine did), you’ll need to start the internet Recovery mode instead. This runs the recovery environment from the internet instead of a partition on your hard drive. Hold Cmd + Option + R at startup to access this. You’ll see a spinning globe instead of the Apple logo.
Connect to a Wi-Fi network if you’re not already. Then wait a bit while your computer downloads the recovery environment. You’ll need to select your language to enter Recovery mode proper.
Step 2: Erase the Disk
Note that if you want to simply reinstall macOS without losing any data, you should skip this step and jump to “Reinstalling macOS” below.To properly reinstall the OS, you’ll first need to erase the disk. To do this, select Disk Utility from the menu.
Next, select your internal hard drive (usually labeled Macintosh HD) from the left sidebar. Switch to the Erase tab on the right side. Make sure the Format is set to Mac OS Extended (Journaled). The default name of Macintosh HD is fine, unless you prefer something else.
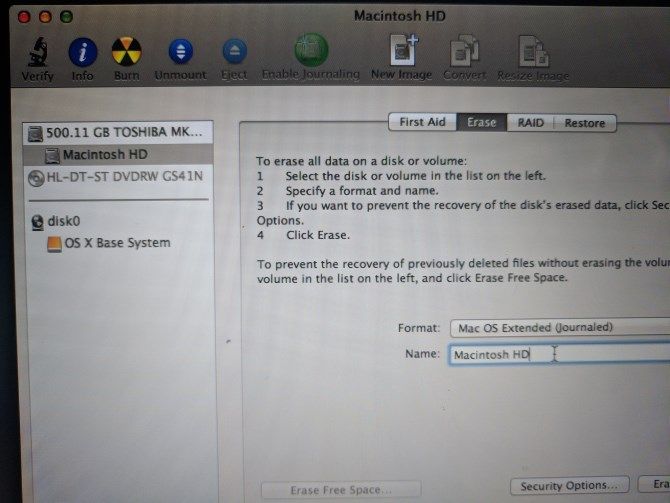
Click Erase and confirm the operation. Once it’s done, you’re ready for a fresh install of macOS. Press Cmd + Q to quit the Disk Utility.
Step 3: Reinstalling macOS
Back on the macOS Utilities menu, choose Reinstall macOS (or Reinstall OS X). Click Continue to proceed; Apple will verify your computer’s eligibility to install the OS. You may see a prompt to enter your Apple ID as part of this process.Accept the license agreement, then click your hard drive to select it for installation. Click Install to start the process. Depending on your computer’s specs (and internet connection speed if using internet recovery), this will take some time.
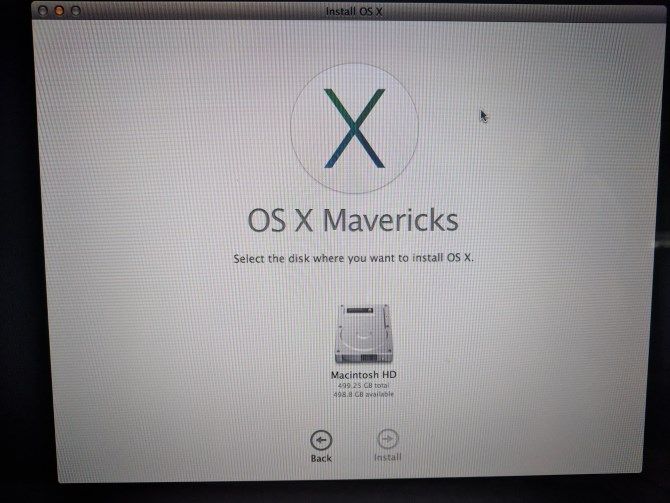
Once you see the Welcome screen, your Mac is back to factory defaults. If you’re selling or giving away your Mac, you can press Cmd + Q at this point. You’ll get a prompt to shut down your Mac; the next owner can proceed with setup later.
If you’re keeping your Mac, we’ll guide you through the setup.Step 4: Set Up macOS Anew
Choose your region on the Welcome screen and click Continue.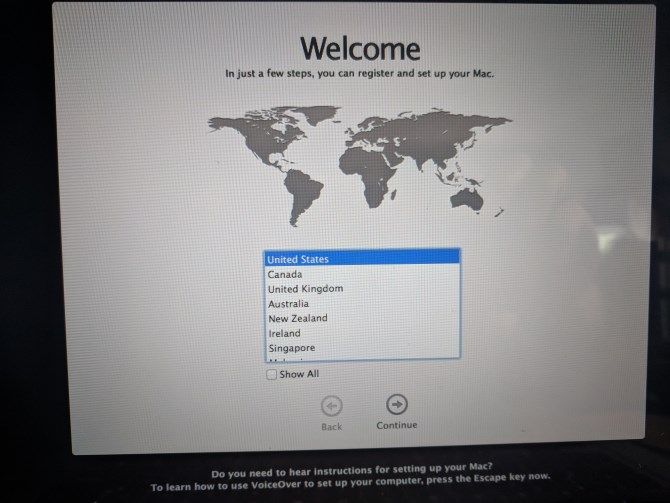
Next, confirm your keyboard layout and hit Continue again. You’ll then need to connect to a wireless network (you can skip this for now if needed).
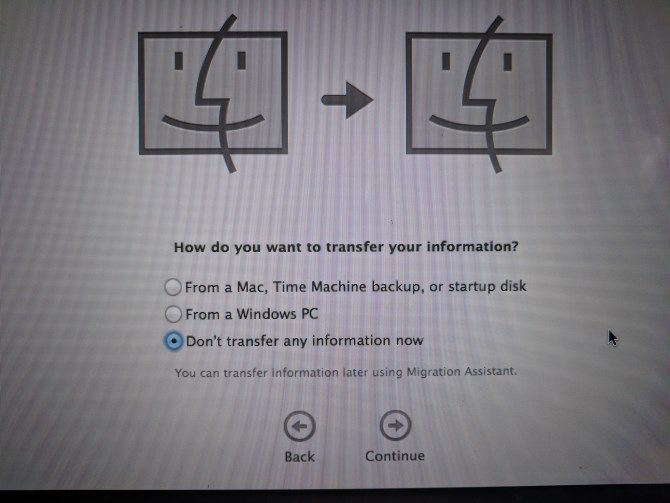
Continuing on, you’ll see the Transfer Information to This Mac screen. Here you can select From a Mac, Time Machine backup, or startup disk to import the data you backed up earlier. Choose Don’t transfer any information now to skip this; you can go through the process later.
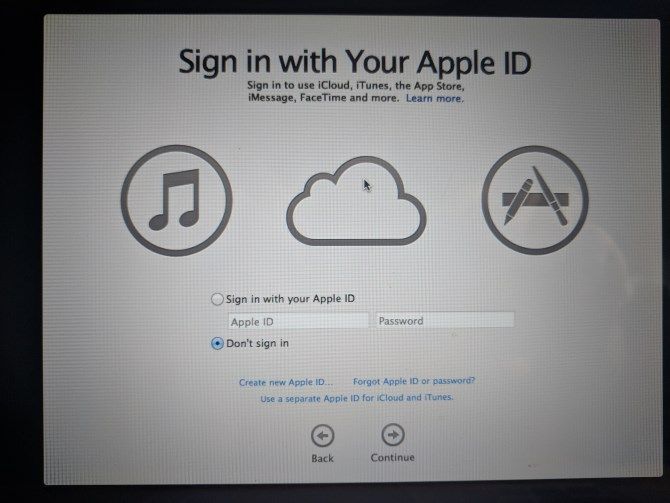
Your Mac will then prompt you to sign in with your Apple ID. Enter your credentials here to sign in, or choose Create a new Apple ID if you don’t have an account yet (check our Apple ID FAQ for more). If you want to use a local account, choose Don’t sign in. However, this will prevent you from using the App Store, FaceTime, and similar.
Accept the terms and conditions, then create your computer account if you didn’t sign in with an Apple ID. From here, give your computer a moment to set up, and you’ll be greeted with your desktop.
Step 5: Update macOS (If Applicable)
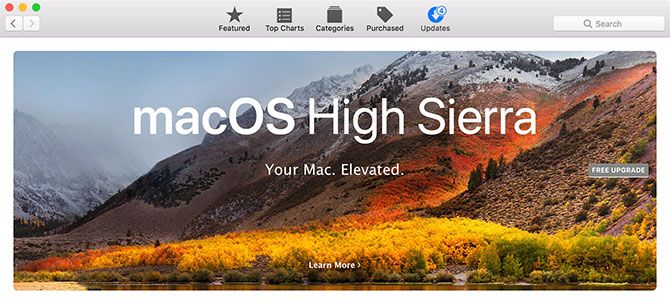
You should check for macOS updates at this point. Open the Apple Menu in the top-left and click Software Update to open the App Store.You’ll see any updates that are available for the current macOS version on the Updates tab, but you should also check on the Featured tab (or search for macOS) for the latest version of macOS available. Click Get and walk through the steps to initiate the update.
Depending on how old your Mac is, you may not be able to update to the newest version. I was able to upgrade to macOS 10.13 High Sierra on the machine formerly running Lion.
A Clean Install of macOS: Done!
Now you know the steps to back up your Mac’s data, erase your hard disk, and install a new copy of macOS. You shouldn’t need to do this as a troubleshooting step except in the most dire of circumstances. But it’s important if you’re selling or giving away your computer.
If a factory reset didn’t fix your issue, check out how to troubleshoot your own Mac.
Theo Makeuseof